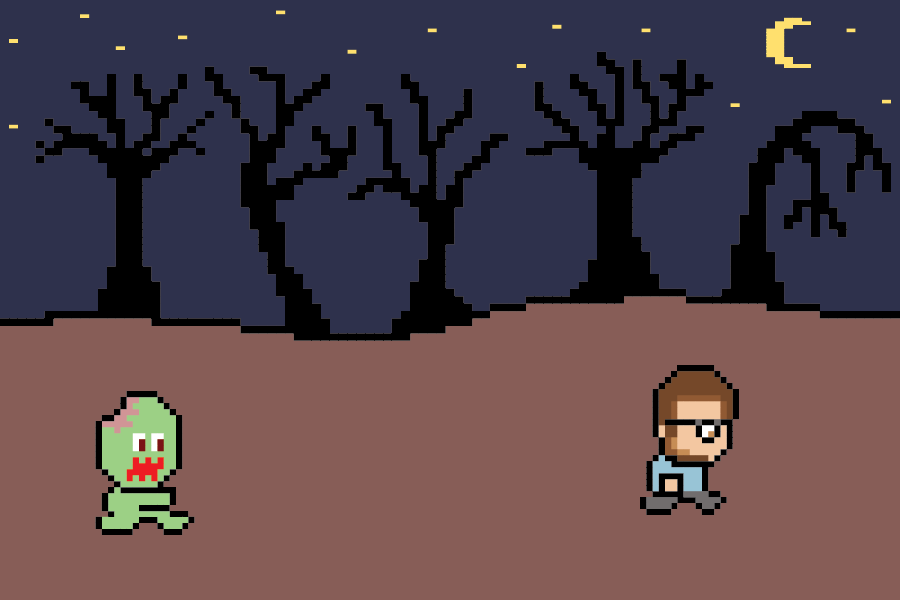
This week marked my initial foray into the world of HTML5 game development. Through trials and tribulations I acquired the ability to navigate my character through the infinite blankness of my webpage. With a reasonable Javascript foundation in conjunction with this tutorial, you too can bring your game, as well as its characters, to life.
Code for this exercise: Github
The main tools discussed in this tutorial include EaselJS, a library that aims to simplify working with the HTML5 Canvas element; and Keymaster, which provides helpers for keyboard shortcuts in web applications. I highly recommend doing the “getting started” exercises for EaselJS and TweenJS, as well as reading about HTML5 Canvas elements before reading this tutorial.
To get started, create your HTML file. It should look something like this:
  <html>
    <head>
      <title>EaselJS Practice</title>
    </head>
    <body onload="init();">
      <canvas id="demoCanvas" width="900" height="600"></canvas>
      <script src="https://code.createjs.com/easeljs-0.8.0.min.js"></script>
      <script src="javascripts/keymaster.js"></script>
      <script src="javascripts/app.js"></script>
    </body>
  </html>
A couple of important parts here:
- You’ll initialize your game when the body of the page is loaded.
onload="init();" - The
canvaselement will go inside the body. It needs an id so that you can create your EaselJS stage upon initialization. - Include the scripts for Easel, Keymaster, and your own code before the closing
bodytag.
Now that that’s done, you can start creating your canvas graphics. I won’t include all of the code here, but of course it can be found in the repo. The first-things-first of working with Easel is that you need to create a Stage, because your epic play – backgrounds, props, characters and all – cannot simply be placed anywhere. From the Easel Docs:
A stage is the root level Container for a display list. Each time its tick method is called, it will render its display list to its target canvas.
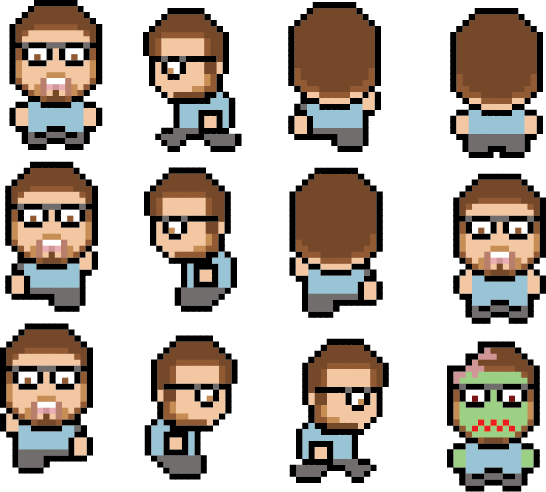
Next, we need our character to be animated (in this case, running). For this, we’ll need a sprite sheet, a collection of images of our character put into a single image file. You might be thinking, “wait, why can’t I just use a .gif of the character walking and call it a day?” Unfortunately, you need to have each individual, incremental frame of the animation in order to put it together into something that moves. You could even make the analogy that rendering each image rapidly, one after the other, is like using a flip book. Besides, controlling each frame will give you much more control over your character. If you’re interested in more of the “why” behind this concept, check out this intro video.
Now to create a SpriteSheet,
we must pass an object containing images, frames, and animations to the SpriteSheet
class. Other parameters, such as framerate, can be added as well. To break each
down:
- images: an array of the images you’ll be using.
- frames: how big each frame in your sprite sheet is, and where it will be placed. It is very important to get this correct, or you’ll end up with some very strange sprites.
- animations: specify a range of images from your sprite sheet, or select individual images by index.
Check out the docs for more options! One great benefit of Easel and the entire CreateJS suite of libraries is that the docs are very detailed and thorough (not to say they aren’t complicated though).
As you’ll see in the source code, I’ve created a section called ‘Sprite Params’ to clearly denote the process for creating your animations. The character thus has standing and running animation options for each direction of travel. There is also a coin sprite sheet image included as well (to be addressed at a later time).
At this point, we’re now able to create a sprite sheet for our character:
var spriteSheet = new createjs.SpriteSheet(data.character);
This will essentially look the same for the coin SpriteSheet as well. Now, we can use it to create our individual sprites with different animations. For example, a sprite for running left will look like this:
characterL = new createjs.Sprite(spriteSheet, "runL");
Note that the Sprite takes a parameter for the SpriteSheet, which in this case is the one we created for our character; and another for the animation, which should correspond with one that we added in our SpriteSheet parameters, in this case “runL”. Do the same for the other animations and you’ll be nearly set to walk in any direction!
When you’re ready to set the character on the stage for his/her big performance, a simple staging is required:
stage.addChild(currentCharacter);
Notice that I’ve set a currentCharacter variable; this is meant to help switch animation states. I’m sure there are more clever ways to handle this, but this approach is beneficial in that it does a decent job of keeping track of what the character is doing at any given time.
Now we need to handle our game’s frame timing. This, as well as our event listeners, will be handled by the Ticker class, which provides the heartbeat for our game, firing at a certain interval. We’ll use the RAF, or requestAnimationFrame timing mode, which tells the browser that we are looking to create and update animations:
createjs.Ticker.timingMode = createjs.Ticker.RAF;
We can now add event listeners for our stage, as well as for our move function, which we’ll get to next:
  createjs.Ticker.addEventListener("tick", stage);
  createjs.Ticker.addEventListener("tick", move);
move checks to see if one of the arrow keys is pressed (thanks Keymaster!);
if so, it will change the sprite to that of the character running in the direction of the arrow pressed.
It will also shift the location of the character towards that direction. Otherwise, it will
set the character to its corresponding standstill position. You can learn more
about time-based animation in this CreateJS tutorial.
changeAnimation sets the new sprite’s x and y coordinates to those of the
previous sprite. Then it removes the current one and replaces it with the new.
changeToStanding checks for the running sprite’s direction and replaces that sprite
with its standing counterpart.
With that, we have the humble beginnings of a game! This is certainly an early iteration of a more involved game, and any feedback is greatly appreciated, especially as more features are added in the near future.